If anyone is curious, I now get most my ideas from my Pinterest. If you follow my link it will take you to my page. Go to my board " Tried Out!" and you will probably see different things I've done with Bean over the past few months!
My Pinterest!
Don't forget to "Follow" me!!!

Don't forget to "Follow" me!!!
DRY ERASE WEEKLY CALENDAR

SUPPLIES YOU WILL NEED
- Scrapbook Paper
- Collage Frame with at least 7 openings
- Printer with Ink
- Pencil and eraser
- Scissors
- Elmer's glue or glue stick
- Collage Frame with at least 7 openings
- Printer with Ink
- Pencil and eraser
- Scissors
- Elmer's glue or glue stick
- Ruler
- Dry Erase Pens/ Markers
- Cricut Machine ( Optional)
- Butter Knife ( Optional)
- Cricut Machine ( Optional)
- Butter Knife ( Optional)
If your anything like me, you don't have the money or time to just go out and buy a frame, scrapbook paper, etc. to do crafts with! Fortunately for me, it was my birthday and Christmas weeks ago, so I had some extra money! I also already had some scrapbook paper from Christmas gifts I made this year. I'm always sure to pick a project that I have the most supplies for already so I don't have to go out and buy anything. For this project all I ended up having to purchase was the frame; which was on sale ( Brand new!) at Micheal's Arts & Crafts for $10!

I started off making sure I had Bean in a secure spot. Somewhere I could get to her easily yet not worry that she was getting into something she shouldn't be. In this case, it was next to me in her high chair at the dinner table. I have a craft table but when I started the project Bean happened to be in a snacky mood and the high chair seemed to be a good spot for the time being. This project took me 2 different days to complete. If your significant other is like mine, they're not interested in watching the children and would rather play on the Xbox. The picture above is normally what I see of my husband 90% of the time he is home or awake. As with most children, Bean only lasts a good 15-20 minutes in a confined spot, so I was forced to stop the project and tend to her. Overall, I'd say the entire project took about 45 minutes.

K. So, obviously this picture doesn't show all the supplies you need but make sure before you sit down, you have everything needed, wherever you are. I made the mistake and on top of picking things Elizabeth kept throwing from her high chair, I also kept running and back and forth grabbing a pencil, or scissors.


Go ahead and pick out 7 sheets of scrapbook paper you'd like to use inside the frame. In my case, I chose 8 cause I had 8 openings. I'm using the extra opening for a " To Do:" area which I plan to point out to my husband each time he comes home. XD
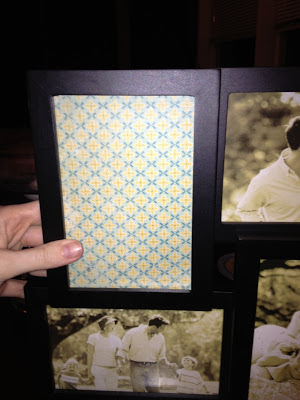
Then grab a ruler and cut out your pieces to however big your opening is. My openings were 4x6's. For some reason, I decided instead of using a ruler ( Which I have!) I used the back of the frame and traced it out on the back of the scrapbook paper and then cut it out. If you do this, make sure it's on the back of the paper; just in case you need to erase or don't cut perfectly.


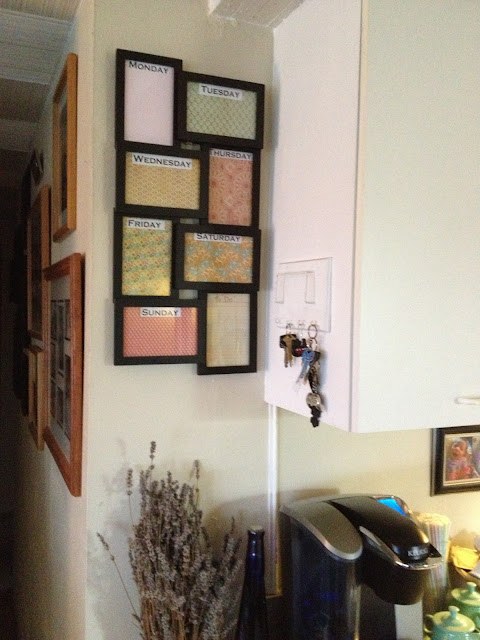 This is my finished product!
Ciao!!!

 |

I started off making sure I had Bean in a secure spot. Somewhere I could get to her easily yet not worry that she was getting into something she shouldn't be. In this case, it was next to me in her high chair at the dinner table. I have a craft table but when I started the project Bean happened to be in a snacky mood and the high chair seemed to be a good spot for the time being. This project took me 2 different days to complete. If your significant other is like mine, they're not interested in watching the children and would rather play on the Xbox. The picture above is normally what I see of my husband 90% of the time he is home or awake. As with most children, Bean only lasts a good 15-20 minutes in a confined spot, so I was forced to stop the project and tend to her. Overall, I'd say the entire project took about 45 minutes.

K. So, obviously this picture doesn't show all the supplies you need but make sure before you sit down, you have everything needed, wherever you are. I made the mistake and on top of picking things Elizabeth kept throwing from her high chair, I also kept running and back and forth grabbing a pencil, or scissors.


Then grab a ruler and cut out your pieces to however big your opening is. My openings were 4x6's. For some reason, I decided instead of using a ruler ( Which I have!) I used the back of the frame and traced it out on the back of the scrapbook paper and then cut it out. If you do this, make sure it's on the back of the paper; just in case you need to erase or don't cut perfectly.


Again, I'm pretty poor and don't own a Cricut Machine to cut out perfect little letters and shapes. Nor do I have a working printer at the moment. Whoo for being poor and awesome! I had my husband print out some days off the week at his work. He printed off 3 different types for me so I could choose. I had originally planned on cutting each letter out, and gluing it down but after cutting 3 letters, I found Bean AND myself do not have the patience for that. I ended up just cutting them out in a big rectangle which didn't look to bad!
I used Elmer's glue to adhere the days of the week onto the scrapbook paper. If you take this route, make sure you don't use to much, specially if you're using cheap printer paper like I did. I'd advise a glue stick if you have one. You don't need a lot, remember your sticking them INSIDE the frame; so they won't be able to come off, as the glass will hold it together.

This is what I used the butter knife for. I'm a weakling and have NO nails so opening the frame up was pretty difficult for me.
I did one day of a week at a time and stuck them inside the frame as I went so Bean wouldn't get a hold of one and ruin it before I finished. You don't have too do that, it would probably go faster if you did them all at once then stick them in. It's all up to you!
When you're all done, make sure you have a spot to put it and that's readable! It's made so you can erase and reuse over and over so you would want it easily accessible!

Ciao!!!

No comments:
Post a Comment